
french cleat tool holder plans pdf
Discover the versatility of French Cleat Tool Holder Plans for efficient workshop organization. These plans offer customizable storage solutions to maximize space and keep tools accessible.
What is a French Cleat System?
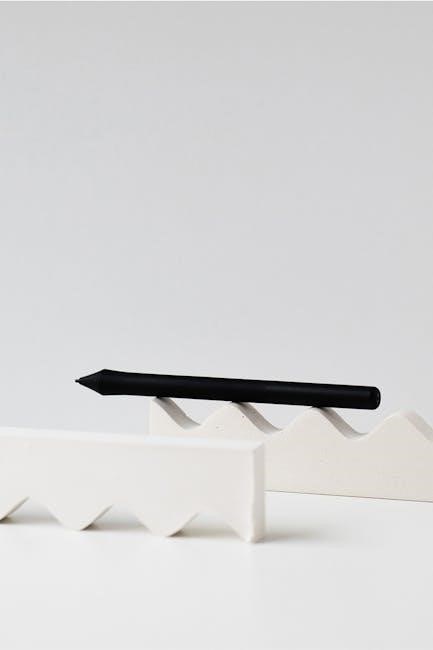
A French cleat system consists of two interlocking components, typically cut at 45-degree angles, designed to hang tools or items securely on a wall. The system includes a wall-mounted cleat and a matching cleat attached to the tool holder, creating a sturdy and adjustable storage solution. This design allows for easy reconfiguration, making it ideal for workshops where tool organization needs are dynamic. The French cleat is known for its simplicity, durability, and versatility, enabling users to maximize wall space efficiently while keeping tools accessible. It is a popular choice for DIY projects and professional setups alike due to its ease of installation and customization capabilities.
Benefits of Using French Cleat for Tool Storage
The French cleat system offers numerous benefits for tool storage. It provides a sturdy and adjustable way to hang tools, ensuring they remain secure and within easy reach. The interlocking design allows for effortless reconfiguration, accommodating changing workshop needs. This system maximizes wall space, keeping floors and workbenches clear, thus enhancing workshop efficiency. Additionally, French cleats are cost-effective and customizable, enabling users to create tailored storage solutions for various tools and accessories. Their durability and ease of installation make them a practical choice for both DIY enthusiasts and professionals seeking to organize their workspace effectively. This versatility ensures that tools are neatly stored and readily accessible, improving overall productivity.
Overview of the French Cleat Tool Holder Plans PDF
The French Cleat Tool Holder Plans PDF provides comprehensive instructions for creating a customizable storage system. It includes detailed diagrams, material lists, and step-by-step guides for building various tool holders. The PDF covers essential projects like shelves, jigsaw holders, and pencil organizers, ensuring versatility for different workshop needs. With clear measurements and assembly instructions, users can construct sturdy and efficient storage solutions. The plans emphasize simplicity, making them accessible to both beginners and experienced woodworkers. This resource is a valuable tool for anyone looking to optimize their workshop space with a durable and adjustable French cleat system. The PDF also offers tips for customization, allowing users to tailor their storage to specific tools and preferences.

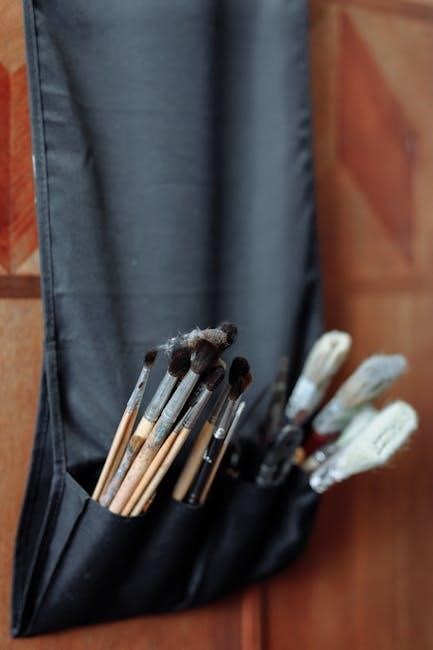
Materials and Tools Needed

Plywood, screws, drills, saws, and measuring tools are essential for constructing French cleat tool holders. Detailed lists are provided in the PDF plans for accuracy.
Essential Materials for French Cleat Construction
To build a French cleat tool holder, you’ll need 3/4-inch plywood for the cleats and tool holders, 1×4 lumber for shelves, and 1×2 or 1×3 boards for added support. Wood screws, such as 1-1/4″ or 1-1/2″ wood screws, are essential for assembling the units. For the cleat system, 2-1/2″ screws are recommended to secure the cleats to the wall. Sandpaper and wood glue can be used for finishing touches. Optional materials include PVC pipes for specialized holders or 1/4″ spacers for shelf alignment. Ensure all materials are durable and suitable for your workshop environment. Detailed lists are provided in the PDF plans for precise measurements and quantities.
Tools Required for Building the Tool Holders
To construct French cleat tool holders, essential tools include a table saw or circular saw for cutting plywood at 45-degree angles, a drill press for precise hole drilling, and an impact driver for securing screws. A miter saw can be used for clean crosscuts, while sanders ensure smooth finishes. Clamps are necessary for holding pieces in place during assembly. Measuring tools like a tape measure, square, and pencil are crucial for accurate cuts and alignments. Safety gear, such as safety glasses and a dust mask, is also recommended. Optional tools include a CNC machine for automated cutting and a jigsaw for curved designs. Having these tools on hand will ensure a successful and efficient build.

Step-by-Step Guide to Building French Cleat Tool Holders
This guide outlines the process of preparing French cleat strips, attaching them to tool holders, and installing the units on the wall for efficient storage. It covers assembling holders, securing cleats, and organizing tools effectively.
Preparing the French Cleat Strips
Start by cutting 45-degree angles on plywood strips using a table or circular saw. Measure and mark 1.5 inches from the mitered edge, then cut straight. Repeat to create eight strips for wall and tool holders. Sand edges for smoothness and ensure precise alignment for secure fitting. Use clamps to maintain stability during cutting. These strips form the backbone of the French cleat system, enabling easy tool organization and reconfiguration.
Assembling the Tool Holder Units
Attach the French cleat strips to your tool holders by aligning the 45-degree angles. Use screws or nails to secure them, ensuring a sturdy connection. For added stability, add a spacer or support bracket. Customize the holders by drilling holes or adding compartments for specific tools. Use plywood or PVC pipes to create compartments for small items like screwdrivers or chisels. Sand all edges for safety and durability. This step ensures your tool holders are functional, customizable, and ready to mount on the French cleat wall system.
Attaching French Cleats to the Wall and Tool Holders
Start by cutting the French cleat strips to the desired length using a table saw or circular saw. Attach the wall cleats by measuring and marking the wall for even spacing, ensuring they are level. Secure the cleats with screws or nails. Next, attach the matching cleat strips to the back of your tool holders, aligning the 45-degree angles. Use screws or nails to fasten them, ensuring a snug fit. Double-check the alignment to ensure the holders will hang securely. For added stability, drill pilot holes to avoid splitting the wood. This step ensures a safe and sturdy connection between the wall and your tool holders, making your workshop more organized and efficient.
Installing the Tool Holders
Once the French cleats are securely attached to both the wall and the tool holders, the final step is to hang the holders. Align the cleat on the tool holder with the one on the wall, ensuring the 45-degree angles match perfectly. Gently push the holder against the wall until it clicks into place. For heavier tools, double-check the stability by tugging lightly. Use a level to ensure proper alignment and adjust as needed. If necessary, drill pilot holes for screws to prevent splitting the wood. This step completes the installation, providing a sturdy and adjustable storage solution for your tools using the French cleat system.

Customizable French Cleat Tool Storage Options
French cleat systems allow for tailored storage solutions, enabling you to create shelves, specialized holders, and additional storage units to suit your specific workshop needs.
Building a French Cleat Wall System
Constructing a French cleat wall system involves cutting 45-degree angles on both the wall strips and tool holders. Start by ripping plywood into 4-inch-wide strips for the wall cleats and 2.5-inch-wide strips for tool holders. Use a table saw or circular saw to achieve precise 45-degree miter cuts. Attach the wall cleats horizontally, ensuring they are level and securely fastened. Once installed, tool holders can be easily mounted and rearranged as needed. This system provides a flexible and efficient way to organize tools, adapting to any workshop layout or storage requirement.
Creating Specialized Tool Holders
Customize your workshop storage by crafting specialized tool holders tailored to your needs. For screwdrivers or chisels, drill holes in scrap plywood and attach French cleat offcuts for stability. Use PVC pipes or additional strips of plywood to create holders for wrenches or drills. This system allows you to design holders that perfectly fit your tools, ensuring efficient organization. With French cleat technology, you can easily adapt and modify your storage solutions as your tool collection evolves. The flexibility of this system ensures every tool has its designated spot, enhancing workshop productivity and accessibility. Build holders that suit your specific requirements, making your workspace more organized and functional.
Adding Shelves and Additional Storage
Elevate your French cleat system by integrating shelves and extra storage solutions. Incorporate shelves made from durable materials like plywood or MDF, attaching them using French cleats for stability. Add hooks or bins to store smaller items, ensuring every space is utilized efficiently. For smaller projects, use 3/4″ spacers to support shelves, preventing sagging and ensuring durability. This modular approach allows you to expand your storage capabilities effortlessly. Customize shelf sizes to fit specific tools or materials, creating a tailored storage system that meets your workshop needs. By combining shelves with tool holders, you achieve a comprehensive organization solution that maximizes space and accessibility.

Tips for Maximizing Your French Cleat System
Optimize your French cleat system by adding shelves, hooks, and spacers for smaller projects. Use scrap plywood for tool holders and PVC pipes for added customization, ensuring maximum efficiency and organization in your workshop.
Optimizing Space in Your Workshop
Maximizing workshop space is achievable with French cleat systems. By installing cleats at varying heights, you can accommodate tools of different sizes. Use shelves for bulkier items and hooks for hanging tools, ensuring every inch is utilized efficiently. Incorporate spacers for smaller projects to maintain stability and prevent wobbling. Additionally, repurpose scrap plywood to create customizable holders for screwdrivers and chisels, adding functionality without extra cost. This modular approach allows you to adapt the system to your evolving needs, keeping your workspace clutter-free and organized. With French cleats, you can tailor your storage to fit both your tools and your unique workshop layout.
Organizing Tools for Efficiency
French cleat systems excel at organizing tools efficiently, ensuring everything is within easy reach. By creating holders tailored to specific tools, such as screwdrivers or chisels, you can maximize accessibility. Drilling holes in scrap plywood and attaching French cleat offcuts provides a sturdy base for these holders. This approach keeps tools neatly arranged and prevents clutter. Additionally, the interlocking design of French cleats allows for quick adjustments, enabling you to reconfigure your storage as your tool collection evolves. This flexibility ensures your workshop remains organized, making it easier to find and store tools, thereby boosting productivity and saving valuable time.
Maintaining and Updating Your Storage System
Maintaining and Updating Your Storage System
Maintaining your French cleat storage system is straightforward and ensures long-term functionality. Regularly inspect the cleats and holders for wear or damage, tightening screws as needed. Clean dust and debris from the cleats to maintain a secure fit. Updating your system is equally simple—add new holders or reconfigure existing ones as your tool collection grows. The modular design allows for easy adjustments, ensuring your storage remains efficient and tailored to your needs. By periodically evaluating your setup, you can adapt it to new tools or workflows, keeping your workshop organized and clutter-free. This flexibility makes the French cleat system a sustainable solution for evolving tool storage requirements.

The French cleat system offers a versatile and efficient solution for organizing tools in any workshop. Its modular design allows for easy customization, making it adaptable to diverse tool collections and workspace sizes. By following the provided PDF plans, you can create a storage system that maximizes space and keeps tools readily accessible. Regular maintenance and updates ensure the system remains functional and relevant as your needs evolve. With its cost-effective and scalable nature, the French cleat tool holder system is a practical investment for any workshop, providing long-term organization and efficiency.